Call us 24/7+17373044959
cabin air filter

How to Change Cabin Air Filter

Maintaining your vehicle goes far beyond oil changes and tire rotations. One of the most overlooked yet critically important maintenance tasks is replacing the cabin air filter. If you have been searching for how to change cabin air filter, this comprehensive guide covers everything you need: what the filter does, where it sits, how to tell when it needs replacing, what the replacement costs, and a detailed step-by-step walkthrough that any driver can follow at home.

A clean, functioning filter improves air quality inside your vehicle, protects your entire HVAC system from premature wear, and ensures every drive is as comfortable as possible. By the end of this guide, you will know exactly how to change cabin air filter safely, quickly, and correctly. Let’s dive straight in.

What Is a Cabin Air Filter?

Before you attempt any replacement work, it helps to understand what is a cabin air filter and why it matters so much to your vehicle’s performance.

A cabin air filter is a small pleated filtration component installed inside your vehicle’s heating, ventilation, and air conditioning (HVAC) system. Every time you switch on the fan, air is drawn through this filter before it enters the passenger compartment. The filter physically traps airborne contaminants so that only clean, filtered air reaches you and your passengers.

Common particles that a cabin air filter captures include:

  • Dust and fine road grit
  • Pollen and mold spores
  • Smog particles and exhaust fumes
  • Bacteria and micro-allergens
  • Insects and larger road debris

Without a functioning filter, all of these contaminants would flow freely through your vents and directly into the air you breathe during every journey. Over time, a saturated or damaged filter stops performing and the problem compounds which is exactly why routine replacement is essential.

Cabin Air Filter Purpose: Why It
Matters More Than You Think

The cabin air filter purpose extends well beyond simply filtering dust. It plays a multi-layered role in both the comfort and mechanical health of your vehicle.

1. Delivering Clean Interior Air

Its most obvious job is ensuring the air circulating inside your car is free from harmful particles. Particularly on highway drives or in congested urban traffic, the volume of pollutants outside the vehicle is significant. The filter acts as the first and last line of defense.

2. Protecting Allergy and Asthma Sufferers

For drivers who suffer from seasonal allergies, asthma, or other respiratory conditions, a fresh filter can make a dramatic difference. A clogged or degraded filter allows allergens to pass through unchecked, triggering symptoms mid-drive.

3. Shielding the HVAC System from Debris

The filter also protects sensitive mechanical components particularly the blower motor and evaporator coil from debris accumulation. Dirt lodged in these components leads to expensive repairs over time.

4. Odor Reduction

Many premium filters use an activated carbon layer specifically designed to absorb exhaust fumes, industrial smells, and general road odors. This keeps the cabin environment fresh regardless of external conditions.

5. Maintaining Optimal Airflow

A clean filter allows air to move freely at the volume your fan setting demands. A blocked filter forces the blower motor to work harder, reducing airflow efficiency and increasing wear on the motor itself.

AC Air Filter Car: Where Is It Located in Your Vehicle?

When drivers search for information about the ac air filter car, the first practical question is usually location because you cannot replace what you cannot find.

In the vast majority of passenger vehicles sold in the United States, the cabin air filter is found in one of three places:

  • Behind the glove compartment (most common location in modern vehicles)
  • Beneath the dashboard on the passenger side
  • Under the hood near the base of the windshield, inside the fresh air intake

The exact location depends entirely on your vehicle’s make, model, and year. A Toyota Camry, a Ford F-150, and a Honda Civic all have their filters in slightly different positions. Before starting the replacement process, consult your owner’s manual — it will contain a diagram showing the precise location and any vehicle-specific instructions for access.

If you no longer have the physical manual, the manufacturer’s official website or a quick online search using your vehicle’s year, make, and model will point you in the right direction.

How Often to Change Cabin Air Filter: The General Rule

A question nearly every vehicle owner asks at some point is: how often to change cabin air filter? The answer depends on a combination of manufacturer recommendations and real-world driving conditions.

The industry-standard recommendation from most vehicle manufacturers is:

  • Every 12,000 to 15,000 miles, OR
  • Once every 12 months whichever comes first

However, these are baseline figures for average driving conditions. Your actual interval may need to be shorter depending on:

  • Driving primarily in high-density urban areas with heavy traffic
  • Living or commuting through regions with high pollen counts
  • Frequent driving on unpaved or dusty rural roads
  • Operating the vehicle in areas with significant industrial air pollution
  • Using the vehicle for commercial purposes with frequent passenger loads

If you regularly drive in cities like Los Angeles, Phoenix, Houston, or New York — where smog, fine particulates, and pollen counts are consistently elevated — plan on inspecting your filter every 6,000 to 8,000 miles rather than waiting for the standard interval.

Cabin Air Filter Replacement Interval: What Manufacturers Say

While the general guideline above applies to most drivers, the official cabin air filter replacement interval varies by manufacturer and is specified in your vehicle’s service schedule.

Here is a general reference table based on driving conditions:

Driving Condition

Recommended Interval

Inspection Frequency

Normal / Light suburban

12 months or 15,000 miles

Annually

Moderate urban traffic

9–10 months or 12,000 miles

Every 6 months

Severe / High dust or pollution

6–8 months or 8,000 miles

Every oil change

The smartest habit is to check the filter at every oil change visit. Most service centers will inspect it for free, and since the car is already in for maintenance, replacement takes only a few extra minutes if needed.

When to Replace Cabin Air Filter: Symptom-Based Triggers

Mileage alone should not be your only trigger. Knowing when to replace cabin air filter based on observable symptoms allows you to act before problems escalate.

Replace the filter immediately if you notice any of the following:

  • Noticeably reduced airflow from vents even at maximum fan speed
  • Persistent musty, moldy, or unpleasant odors when the HVAC is running
  • A significant increase in interior dust accumulation on surfaces and dashboards
  • Unusual whistling or rattling sounds from the vent area
  • Windows that fog up quickly and clear much more slowly than usual
  • An increase in allergy or respiratory symptoms during drives

Even if your mileage hasn’t reached the recommended threshold, these warning signs are strong indicators that your filter has reached its functional limit. Environmental factors can clog a filter well ahead of schedule, especially after events like heavy pollen seasons, dust storms, or wildfire smoke exposure all of which are increasingly common in parts of the U.S.

Bad Cabin Air Filter Symptoms: Recognizing the Warning Signs Early

Understanding bad cabin air filter symptoms gives you an early warning system that helps you avoid both discomfort and costly HVAC repairs down the line.

Here are the most frequently reported symptoms in order of how noticeable they typically become:

Weak or Restricted Airflow

This is usually the first sign. When a filter becomes heavily clogged, it physically restricts the volume of air that can pass through, regardless of how high you set the fan. Many drivers initially assume the blower motor is failing — when in reality, a $20 filter replacement solves the problem entirely.

Musty or Moldy Odors

A dirty filter saturated with moisture and organic debris becomes a breeding ground for mold and bacteria. The result is an unpleasant smell that fills the cabin every time the HVAC is activated.

Increased Allergy Flare-Ups

If you or your passengers start experiencing more frequent sneezing, eye irritation, or respiratory discomfort specifically during drives, a degraded filter is a likely culprit.

Reduced AC and Heating Performance

Restricted airflow directly reduces your system’s ability to cool or heat the cabin efficiently. The AC compressor and heating core are delivering full capacity, but the filter bottleneck prevents conditioned air from reaching the passenger space effectively.

Noisy Fan Operation

A severely clogged filter can cause the blower motor to strain audibly producing a louder-than-normal hum or vibration as it works against the blockage.

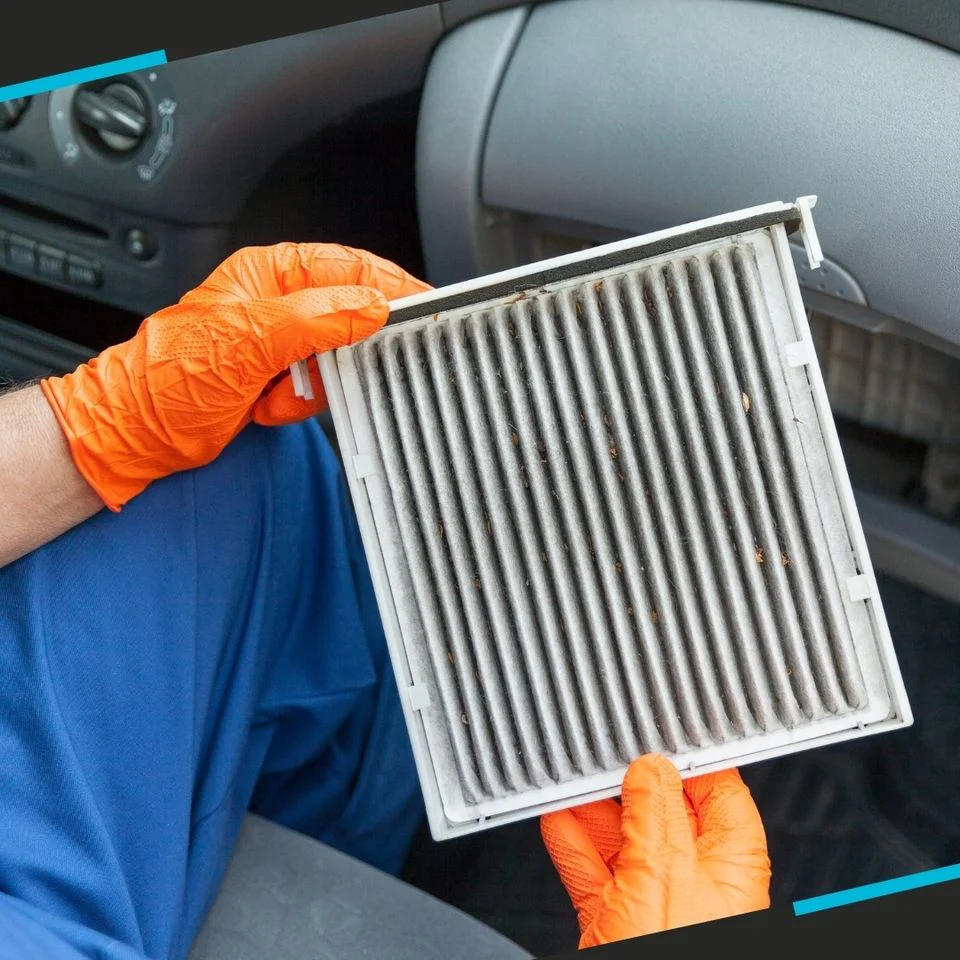
Signs of a Dirty Cabin Air Filter: What to Look For During Inspection

Many of the warning signs are performance-based, but there are also direct visual signs of a dirty cabin air filter that you can check yourself in just a few minutes.

Visual Inspection Indicators

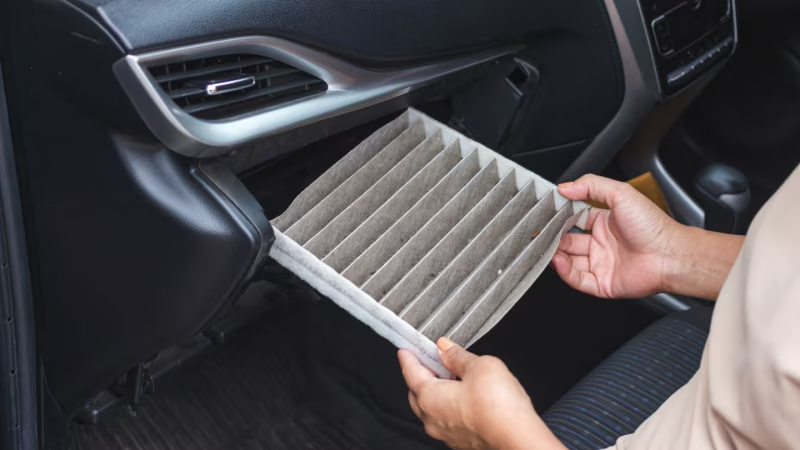
  • The filter surface appears dark grey, brown, or black rather than its original white or cream color
  • Visible debris leaves, insects, or compacted dirt is trapped in the filter pleats
  • The pleats appear compressed or matted together, indicating the filter is saturated
  • Any visible mold growth or discoloration beyond standard dirt accumulation

Performance Indicators During Inspection

  • Hold the filter up to a light source — very little light passing through means severe blockage
  • Tap the filter gently over a trash can; excessive dust and debris falling out confirms heavy soiling

A new filter is generally white or cream-colored with well-defined, open pleats. If your current filter looks significantly darker and more compacted, it is time for a replacement regardless of mileage.

cabin air filter

How to Change Cabin Air Filter: Complete Step-by-Step Instructions

Now for the core of this guide. Here is exactly how to change cabin air filter in a standard passenger vehicle, using the most common glove box access method. This process applies to the majority of U.S. market vehicles including most Toyota, Honda, Nissan, Ford, Chevrolet, and Hyundai models.

What You Will Need

  • Replacement cabin air filter (correct part number for your vehicle)
  • Clean cloth or vacuum (optional, for cleaning the housing)
  • Your owner’s manual or a reference guide for your vehicle

Step 1: Turn Off the Vehicle

Switch the engine off and make sure the HVAC system is completely off. This prevents debris from being drawn into the system during the swap.

Step 2: Open and Empty the Glove Box

Remove any items stored in the glove box. You need clear access to the interior.

Step 3: Release the Limiting Tabs

On the sides of the glove box, you will find small tabs or stops that limit how far the box swings down. Squeeze or push these inward while lowering the glove box fully so that it drops down and out of the way, revealing the filter housing behind it.

Step 4: Locate and Open the Filter Housing

You will see a rectangular plastic housing. Unclip or slide open the access panel. In some vehicles, this requires pressing two side clips simultaneously.

Step 5: Remove the Old Filter

Slide the old filter out carefully. Pay attention to the direction of the airflow arrow printed on the filter’s frame  you will need to replicate this orientation with the new filter. Dispose of the old filter in a sealed bag to contain trapped dust and debris.

Step 6: Clean the Housing (Optional but Recommended)

Use a dry cloth or a low-power vacuum to remove any loose debris from inside the filter housing before inserting the new unit. This prevents contamination of your brand-new filter.

Step 7: Install the New Filter

Slide the replacement filter into the housing with the airflow arrow pointing in the correct direction (typically toward the blower motor). Make sure it seats flat and flush without any gaps around the edges.

Step 8: Close the Housing and Reassemble

Clip the access panel back into place. Swing the glove box back up and re-engage the limiting tabs. Return any items to the glove box.

Step 9: Test the System

Start the vehicle and run the fan at various speeds. Airflow should feel noticeably stronger and cleaner if the old filter was significantly clogged. Check for any unusual sounds that might indicate the filter is not seated correctly.

Total time required: 10 to 20 minutes for most vehicles. No specialist tools are needed. This is one of the simplest and most rewarding DIY maintenance tasks available to vehicle owners.

Cabin Air Filter Replacement Cost: DIY vs. Professional Service

Understanding cabin air filter replacement cost helps you make an informed decision about whether to handle the job yourself or take it to a service center.

Service Option

Estimated Cost

Time Required

DIY replacement (filter only)

$15 – $60

10–20 minutes

Dealership service

$60 – $120

Included in service visit

Independent auto shop

$45 – $90

15–30 minutes

The labor markup charged by dealerships and service centers is significant given how straightforward the replacement process is. For most drivers comfortable with basic vehicle maintenance, purchasing the filter and handling it yourself provides excellent value.

How Much Does a Cabin Air Filter Cost? A Complete Price Breakdown

If you are buying the part yourself, how much does a cabin air filter cost depends primarily on the filter type and brand you choose.

Filter Types and Price Ranges

  • Basic paper/particulate filter: $10 – $25. Suitable for most drivers in average conditions. Captures dust, pollen, and debris effectively.
  • Activated carbon filter: $25 – $45. Adds an odor-absorbing carbon layer. Recommended for urban drivers or those sensitive to exhaust smells.
  • Premium HEPA-grade filter: $40 – $65. Highest filtration efficiency. Captures the smallest particles and is ideal for allergy sufferers.
  • OEM (Original Equipment Manufacturer) filter: $30 – $80. Guaranteed fit and performance but typically carries a brand premium over equivalent aftermarket options.

For most everyday drivers, a quality activated carbon filter in the $25 – $40 range represents the best balance of performance and cost. Purchasing from major retailers such as AutoZone, O’Reilly Auto Parts, Amazon, or Walmart typically provides the most competitive pricing.

Cabin Air Filter Price: Why Costs Vary Between Products

The cabin air filter price you encounter can vary quite significantly even for the same vehicle. Here is what drives those differences:

Filter Material and Technology

Basic paper filters cost the least because they use standard filtration media. Activated carbon filters incorporate an additional manufacturing step and materials. HEPA-grade filters use denser, more precisely engineered media driving the price higher.

OEM vs. Aftermarket

OEM filters are produced by or for the vehicle manufacturer and carry a brand premium. Reputable aftermarket brands like Fram, Bosch, K&N, and Purolator often provide equivalent or superior performance at a lower price point.

Vehicle Type

Luxury and European vehicle brands frequently have larger, more complex filter assemblies that cost more to produce. A filter for a BMW 5 Series or Mercedes-Benz E-Class will generally cost more than one for a Toyota Corolla or Honda Accord.

Retailer and Purchase Channel

Dealership parts departments typically charge more than aftermarket retailers. Online marketplaces and auto parts chain stores often offer the same quality at a meaningful discount.

The Broader Benefits of Staying on Schedule

Knowing how to change cabin air filter is only one part of the equation. Equally important is understanding why staying consistent with this maintenance task delivers compounding benefits over the life of your vehicle.

  • Improved air conditioning and heating efficiency — your system achieves target temperatures faster
  • Extended blower motor lifespan — no longer straining against a blocked filter
  • Better fuel efficiency — a reduced electrical load from the blower motor contributes marginally to fuel economy
  • Enhanced resale value — comprehensive maintenance records demonstrate responsible ownership
  • Year-round comfort — clean filtered air regardless of season, weather, or driving environment

The cost of a single filter replacement — typically $15 to $60 for a DIY job — is trivial compared to the cost of replacing a failed blower motor ($200 – $600+) or addressing chronic respiratory issues caused by consistently poor cabin air quality.

How to Choose the Right Replacement Filter for Your Vehicle

Not all filters are interchangeable. When purchasing a replacement as part of learning how to change cabin air filter properly, always confirm compatibility using one of these methods:

  • Enter your vehicle’s year, make, model, and engine size into the retailer’s online parts finder
  • Check the part number printed on your existing filter before disposal
  • Consult your owner’s manual for the OEM part number
  • Ask a parts store associate to cross-reference the correct filter for your specific vehicle

Installing the wrong filter one that is too small, too large, or incorrectly shaped will leave gaps in the housing and allow unfiltered air to bypass the filtration system entirely, defeating the purpose of the replacement.

Cabin Air Filter vs. Engine Air Filter: Know the Difference

Many drivers confuse these two components. While both are filters that require periodic replacement, they serve completely different functions:

Feature

Cabin Air Filter

Engine Air Filter

Filters air for…

Passenger compartment

Engine combustion chamber

Located…

Inside HVAC / dashboard area

Engine bay air intake

Replacement interval

12,000–15,000 miles

15,000–30,000 miles

Impact of neglect

Poor air quality, HVAC damage

Reduced engine performance

When you take your vehicle in for service, confirm that both filters have been inspected. Replacing only one while neglecting the other leaves a maintenance gap.

Frequently Asked Questions

Can I drive with a clogged cabin air filter?

Yes, a clogged filter will not prevent the vehicle from driving. However, it will progressively worsen air quality inside the cabin, reduce HVAC efficiency, and place additional strain on your blower motor. It is never advisable to leave a severely clogged filter in place for extended periods.

Can I clean and reuse a cabin air filter?

Some reusable filters — typically those made with washable synthetic media — can be cleaned and reinstalled. Standard paper or carbon filters are not designed to be washed and should be replaced when dirty. Attempting to clean a disposable filter generally damages the filtration media and reduces its effectiveness.

Does a new cabin air filter improve AC performance?

Yes. If your current filter is significantly clogged, installing a fresh replacement will immediately restore proper airflow volume. This is one of the key reasons drivers want to learn how to change cabin air filter themselves — the performance improvement after replacement is often immediately noticeable.

How do I know if my car has a cabin air filter?

Most vehicles manufactured after the year 2000 are equipped with a cabin air filter. Check your owner’s manual under the maintenance schedule section. If no cabin air filter is listed, your vehicle may route outside air without filtration — though this is increasingly rare in modern models.

What happens if I install the filter backwards?

Installing the filter with the airflow arrow pointing in the wrong direction significantly reduces filtration effectiveness. The filter’s pleats are engineered to catch particles from a specific direction. Always match the airflow arrow to the direction indicated in the housing or owner’s manual before closing the access panel.

Final Thoughts

If you have read through this guide, you now have a complete, practical understanding of how to change cabin air filter at home along with everything you need to know about timing, cost, filter selection, and warning signs.

This is genuinely one of the most accessible maintenance tasks available to vehicle owners. It requires no specialist tools, takes under 20 minutes, and delivers immediate, tangible improvements to both air quality and HVAC performance. The financial case is equally compelling: a $20 filter every 12 months prevents far more expensive repairs and keeps every drive comfortable for you and your passengers.

Add cabin air filter inspection to your annual maintenance checklist, stay alert to the warning signs covered in this guide, and you will maintain a cleaner, healthier, and more efficient driving environment year-round. Whether you drive a compact sedan in Chicago or a full-size truck in Texas, this small component plays an outsized role in your daily driving experience.

Take ten minutes this weekend your lungs will thank you.

Wheel Bearing

The Complete Guide to Wheel Bearing: You Need to Know

That low, rhythmic hum building up as you hit the highway. The subtle wobble you feel through the steering wheel on a long straightaway. More often than not, these are your car’s way of telling you that a wheel bearing is starting to give up. It’s one of those components most drivers never think about — until the noise becomes impossible to ignore.

A wheel bearing sits quietly inside your wheel hub, spinning thousands of times every mile you drive. It handles the full weight of the vehicle, absorbs road shocks, and allows your wheels to rotate with minimal friction. When it wears out, the consequences go well beyond an annoying noise — a severely failing bearing can cause a wheel to seize or even detach at highway speeds.

In this guide, we cover everything you need to know: what a wheel hub bearing is and how it works, how to tell when it’s failing, the difference between a front wheel bearing and a rear wheel bearing, what wheel bearing replacement involves, and what you can expect to pay in wheel bearing replacement cost. Let’s get into it.

What Is a Wheel Bearing and What Does It Do?

At its core, a wheel bearing is a precision-engineered assembly of steel balls or tapered rollers housed inside a metal ring called a race. Its job is deceptively simple: allow your wheel to rotate smoothly and consistently around the axle without generating excessive heat or friction. In practice, however, it does this while handling thousands of pounds of vehicle weight, braking torque, and lateral forces from cornering — all at the same time.

Most modern cars use what’s called a wheel hub bearing assembly — a pre-sealed, pre-packed unit that integrates the bearing races, the rolling elements, and the hub flange into a single bolt-on component. Many of these units also incorporate the ABS tone ring, making them a multi-functional part of your vehicle’s safety system. When your wheel hub bearing fails, it can trigger the ABS warning light in addition to causing noise and vibration.

Older vehicles used serviceable tapered roller bearings that could be removed, cleaned, re-packed with grease, and re-adjusted. Today’s sealed wheel bearing assemblies are designed to be replaced as a complete unit when they wear out, which simplifies the repair process and eliminates the risk of improper packing or adjustment.

Types of Wheel Bearings

Understanding the type of wheel bearing your vehicle uses helps you shop for the right replacement and understand what’s involved in servicing it.

Ball Bearings

The most widely used design in modern passenger cars. Ball bearings use a ring of small spherical steel balls running between inner and outer races. They’re well-suited to handling both radial loads (vehicle weight pushing down) and axial loads (side forces during cornering). Compact, durable, and low-friction, ball-type wheel bearings are the go-to choice for most front-wheel-drive and rear-wheel-drive cars.

Tapered Roller Bearings

Common in trucks, SUVs, vans, and rear axles of older vehicles. Tapered roller bearings use cone-shaped rollers that can handle much heavier radial and thrust loads. Unlike sealed assemblies, these bearings are typically serviceable — they can be cleaned, re-packed with bearing grease, and re-adjusted for preload. If your vehicle still uses this style, a qualified technician should inspect and service them during brake jobs and major tire rotations.

Wheel Hub Bearing Assemblies

The dominant design on the road today. A wheel hub bearing assembly packages the bearing, hub flange, and often the ABS reluctor ring into one sealed, ready-to-install unit. There’s no need to pack grease or set bearing preload — it bolts directly onto the spindle or knuckle. When the bearing wears out, the entire hub assembly is replaced. This simplifies wheel bearing replacement considerably and ensures consistent factory-spec performance every time.

Warning Signs of a Failing Wheel Bearing

The earlier you catch a worn wheel bearing, the less damage it does to surrounding components — and the safer your vehicle remains. Here are the symptoms you should never ignore:

  • Grinding or Humming Noise: A rhythmic hum or growling that increases with vehicle speed is the classic indicator. It’s often mistaken for road noise or tire noise, but if the sound changes with speed changes rather than wind, suspect the bearing.
  • Noise That Changes Through Corners: This is the most reliable way to identify which wheel bearing is failing. If the grinding gets louder when you steer left, the right bearing is likely worn. Louder when turning right? Check the left side. This happens because cornering shifts the vehicle’s weight, loading one bearing more than the other.
  • Steering Wheel Vibration: A worn front wheel bearing can send vibrations through the steering column. You’ll feel it most at highway speeds, and it may intensify or ease slightly as you change speed.
  • Uneven or Accelerated Tire Wear: A failing bearing causes the wheel to run at a slight angle, creating uneven contact with the road and accelerating tire wear on one edge. If you notice feathering or one-sided wear, have the bearings inspected along with the alignment.
  • ABS Warning Light: Because the ABS tone ring is built into many wheel hub bearing assemblies, bearing failure can disrupt ABS sensor signals and trigger the warning light on your dash.
  • Loose or Wobbly Wheel: Grab a suspect wheel at 9 and 3 o’clock and rock it side to side with the vehicle safely supported.

If you notice any combination of these signs, don’t delay. A completely seized bearing can cause catastrophic wheel separation — a scenario no driver wants to face.

Front Wheel Bearing vs. Rear Wheel Bearing: Key Differences

Front Wheel Bearing

The front wheel bearing is generally the harder-working of the two. In front-wheel-drive vehicles, the front bearings not only support the vehicle’s weight and handle steering forces — they also transmit engine torque to the road. That’s a lot of demand on a single component. Combined with the fact that the front of most vehicles carries more weight (especially with a transversely mounted engine), front wheel bearings tend to wear faster than rear ones.

When a front wheel bearing begins to fail, the symptoms are usually more pronounced and easier to feel. Steering feel degrades, the wheel may vibrate, and the humming or grinding noise is often clearly audible from the front of the vehicle. Because of their complexity — particularly in front-wheel-drive cars where the CV axle runs through the hub — front wheel bearing replacement cost tends to be slightly higher than for the rear.

Rear Wheel Bearing

The rear wheel bearing typically leads a quieter life in front-wheel-drive vehicles, handling the vehicle’s weight without the added stress of steering or engine torque. This generally means rear wheel bearings last longer in FWD cars than their front counterparts. In rear-wheel-drive and all-wheel-drive vehicles, however, the rear bearings also carry drive torque and wear at a rate more comparable to front bearings.

Symptoms of a failing rear wheel bearing include a hum or roar from the back of the car, vibration through the seat or floorboard, and — on vehicles with rear-mounted ABS sensors in the hub — an ABS warning light. Because rear bearings are often simpler to access than front ones, rear wheel bearing replacement cost is frequently a bit lower, though this varies significantly by vehicle make and model.


Wheel Bearing

Wheel Bearing Replacement: Step-by-Step Process

Knowing what wheel bearing replacement actually involves helps you understand the labor charges and set realistic expectations. Here’s how a typical job unfolds on a modern vehicle equipped with a hub assembly:

  • Step 1 – Raise and Secure the Vehicle: The car is lifted and placed on jack stands. The wheel is removed to expose the hub and brake components.
  • Step 2 – Remove Brake Components: The brake caliper is unbolted and hung safely to avoid stressing the brake hose. The rotor or drum is then slid off the hub.
  • Step 3 – Disconnect the CV Axle (Front Only): On front-wheel-drive vehicles, the large axle nut is removed and the CV shaft is carefully pushed back through the hub. This step adds time to a front wheel bearing replacement job and contributes to the higher front wheel bearing replacement cost compared to rear jobs.
  • Step 4 – Remove the Old Hub Assembly: The hub mounting bolts are removed and the old wheel hub bearing assembly is pulled from the steering knuckle or axle flange.
  • Step 5 – Install the New Assembly: The new wheel hub bearing is seated in the knuckle and torqued to factory specifications. Proper torque is critical — overtightening or under-tightening can prematurely damage the new bearing.
  • Step 6 – Reassemble and Test: Brake components, axle nut, and wheel are reinstalled. The mechanic performs a test drive to confirm the noise is eliminated and that ABS function (if applicable) is restored.

On most vehicles, a single wheel bearing replacement takes 1 to 2 hours. Press-in bearing designs that require a hydraulic press can add another hour or more to the job, which is one reason wheel bearing replacement cost can vary widely between vehicle models.

Wheel Bearing Replacement Cost: Full Breakdown

The wheel bearing replacement cost is one of the first things drivers want to know when they suspect a bad bearing. The answer isn’t one-size-fits-all — it depends on vehicle type, bearing location, parts quality, and the shop you choose. Here’s a realistic breakdown to help you budget:

Parts Cost

  • Aftermarket wheel hub bearing assembly (standard vehicles): $40 – $150
  • Premium aftermarket brand (SKF, Timken, Moog): $80 – $200
  • OEM (dealer-sourced) assembly: $150 – $350+
  • Press-in bearing set (older vehicle design): $30 – $100

Labor Cost

  • Independent repair shop: $70 – $130 per hour
  • Dealership service center: $110 – $200 per hour

Total Estimated Cost Per Wheel

  • Front wheel bearing replacement cost: $150 – $450 per wheel (higher due to CV axle access)
  • Rear wheel bearing replacement cost: $120 – $380 per wheel (simpler access on most FWD vehicles)

As a rule, front wheel bearing replacement cost runs $30–$80 more per wheel than the rear on most front-wheel-drive platforms, mainly due to the extra time required to work around the CV axle. On rear-wheel-drive trucks and SUVs, the gap narrows — and in some cases the rear is actually more expensive because of the larger, heavier bearing assemblies required.

To keep your wheel bearing replacement cost as low as possible without sacrificing quality, choose a reputable independent shop over a dealership for the labor and opt for a premium aftermarket brand rather than the cheapest available. Quality brands like SKF and Timken manufacture bearings that meet or exceed OEM specifications at a fraction of the dealer parts price.

What Drives the Price Up or Down?

  • Vehicle Type: Compact sedans are generally cheaper to service than trucks, SUVs, and luxury vehicles due to simpler access and less expensive parts.
  • Press-In vs. Bolt-On Design: Bolt-on hub assemblies are faster to replace. Press-in bearings require a hydraulic press, adding labor time and cost.
  • Location: Labor rates vary significantly by region — a wheel bearing replacement in a major metropolitan area will typically cost more than the same job in a rural town.
  • Parts Availability: Common vehicles have many aftermarket options and competitive pricing. Rare or imported vehicles may have limited parts availability and higher costs.

How Long Do Wheel Bearings Last?

A well-manufactured wheel bearing in normal driving conditions can last anywhere from 85,000 to 100,000+ miles. Some last even longer when conditions are favorable. However, a variety of factors can cut that lifespan significantly:

  • Driving Style: Hard cornering, aggressive braking, and frequent high-speed driving put extra load on all four wheel bearings and accelerate wear.
  • Road Surface: Constant exposure to potholes, rough gravel, speed bumps, and uneven pavement introduces repeated impact loads that shorten bearing life — particularly for the front wheel bearingwhich bears steering stress on top of road shocks.
  • Water and Contamination: Driving through deep standing water can force moisture past the bearing seals. Once moisture enters a sealed wheel hub bearing, corrosion and pitting accelerate rapidly.
  • Installation Quality: Incorrect torque, misalignment, or using improper tools during wheel bearing replacement can dramatically reduce the life of a brand-new bearing. Always follow manufacturer torque specs.
  • Vehicle Curb Weight: Heavier vehicles — trucks, SUVs, vans — place more constant load on their wheel bearings than lighter passenger cars, wearing them out faster.
  • Wheel Offset and Suspension Modifications: Aftermarket wheels with excessive offset or lowered suspension change the load angles on wheel bearings and can cause premature failure.

DIY Wheel Bearing Replacement: Is It a Realistic Option?

For home mechanics with a solid tool collection and some suspension experience, a wheel bearing replacement on a bolt-on hub assembly is absolutely achievable. The job is a satisfying one that can save $100–$200 in labor. That said, it’s not a beginner project, and a few specific scenarios require professional equipment.

What You’ll Need for a Bolt-On Hub Assembly

  • Floor jack rated for your vehicle’s weight, plus quality jack stands
  • Breaker bar and deep socket set (including 32–36mm for the axle nut)
  • Torque wrench — critical for proper bearing and axle nut torque
  • New wheel hub bearing assembly (always use a quality brand)
  • Anti-seize compound and penetrating oil
  • Vehicle-specific repair manual or a reliable online walkthrough

When to Call a Professional Instead

  • Your vehicle uses press-in bearings rather than a bolt-on hub assembly — these require a hydraulic bearing press
  • The old hub assembly is seized to the knuckle due to rust and corrosion
  • You’re replacing a front wheel bearing on an all-wheel-drive vehicle, where additional drivetrain components must be disconnected
  • You’re not confident in your ability to set proper torque on suspension and axle fasteners

If any of these apply, the potential cost of damaging a new bearing or a connected component far outweighs the labor savings. A professional wheel bearing replacement done right is always a better investment than a DIY job done wrong.


Wheel Bearing

Choosing the Right Wheel Bearing for Your Vehicle

Not every wheel hub bearing on the market offers the same quality. Here’s what to look for when selecting a replacement:

  • Brand Reputation: SKF, Timken, Moog, FAG, and NSK are among the most trusted manufacturers in the industry. Their bearings meet or exceed OEM tolerances and are built to last.
  • ABS Compatibility: If your vehicle has ABS, confirm that the replacement wheel hub bearing includes the integrated tone ring and is compatible with your vehicle’s sensor type.
  • Warranty Coverage: Look for at least a 1-year / 12,000-mile warranty as a baseline. Premium brands often offer 2- to 3-year coverage, which reflects their confidence in the product.
  • Exact Fitment: Always verify the part using your vehicle’s year, make, model, trim, and drivetrain configuration. A bearing that’s close but not exact may not seat properly, leading to premature failure.
  • OEM vs. Aftermarket: OEM parts guarantee a perfect fit and factory-spec materials. However, premium aftermarket brands often offer equivalent or superior performance at a lower price — making them a smart choice for most wheel bearing replacement

At AutoPartsHub, we stock a comprehensive range of wheel hub bearing assemblies from the brands professionals trust. Use our vehicle fitment tool to find the exact wheel bearing for your car, and get it shipped to your door or local shop within days.

Practical Tips to Extend Wheel Bearing Life

While sealed wheel bearings are maintenance-free by design, your driving habits and vehicle upkeep habits have a big impact on how long they last:

  • Rotate tires every 5,000–7,500 miles to keep wear balanced across all four wheel positions — and by extension, all four bearings.
  • Avoid driving through standing water deeper than a few inches. 
  • Have your wheel alignment checked annually and after any significant impact. Misalignment puts chronic lateral stress on both front wheel bearing and rear wheel bearing
  • Don’t ignore other suspension wear. Loose tie rod ends, worn control arm bushings, and failing struts all increase the shock loads transferred to your wheel bearings.
  • Ask your mechanic to do a quick bearing check whenever your brake pads or rotors are being replaced — it’s already taken apart to that level anyway.
  • Stick to your vehicle’s rated load capacity. Consistently overloading your car or truck accelerates wear on every bearing in the drivetrain.

Should You Replace Both Bearings at the Same Time?

If one wheel bearing fails on a high-mileage vehicle, it’s worth seriously considering replacing the opposite-side bearing at the same time. Here’s the logic:

  • Both bearings were installed at the factory on the same day and have experienced identical mileage and wear conditions.
  • Labor costs are substantially reduced when both sides are done in one visit — the mechanic’s tools are already out and the vehicle is already raised.
  • You avoid the inconvenience and additional labor charge of returning to the shop a few months later for the second bearing.

This paired-replacement approach is especially sensible for the front wheel bearing pair on front-wheel-drive vehicles, where both bearings share the same demanding load conditions. The additional front wheel bearing replacement cost for the second unit is largely in parts — labor barely increases since both sides are being addressed in the same session. Talk it over with your mechanic and get a quote for both at once before deciding.

Frequently Asked Questions

Q: Can I keep driving with a bad wheel bearing?

Technically yes for a short distance, but it’s not safe and not recommended. A wheel bearing in the early stages of failure may allow hundreds of miles of driving before catastrophic failure. However, as it worsens, it can overheat, seize, or cause the wheel to detach from the vehicle entirely. Don’t put it off — schedule a wheel bearing replacement as soon as you suspect a problem.

Q: How do I pinpoint which wheel bearing is bad?

The turning test is your best diagnostic tool: at a safe speed, gently weave the vehicle left and right. If the noise gets louder weaving right (loading the left side), the left wheel bearing is likely the culprit, and vice versa. A mechanic can confirm with a road test and physical inspection — checking for play in the wheel and listening for changes when spinning the hub by hand.

Q: What’s the difference in cost between front and rear bearing replacement?

On most front-wheel-drive vehicles, front wheel bearing replacement cost runs $30–$80 higher per wheel than rear wheel bearing replacement cost. This is primarily due to the additional labor involved in disconnecting the CV axle shaft at the front. On rear-wheel-drive or all-wheel-drive platforms, the cost difference narrows considerably.

Q: How long does the job take at a shop?

A standard wheel bearing replacement on a bolt-on hub assembly takes 1 to 2 hours per wheel. If both sides are being done simultaneously, expect 2 to 3 hours total. Vehicles with press-in bearings or significant corrosion can take longer.

Q: Are aftermarket wheel bearings as good as OEM?

Premium aftermarket wheel hub bearing assemblies from established brands like SKF, Timken, and Moog are generally considered equivalent to OEM quality — and in some cases, built to tighter tolerances than the original part. Avoid the cheapest no-name options, as inconsistent quality can mean early failure and the need for a second wheel bearing replacement sooner than expected.

wheel bearing replacement cost

What is the Wheel Bearing Replacement Cost? A Complete Guide for US Car Owners

If your car has been making a grinding, humming, or growling noise while driving, there’s a good chance you’re dealing with a worn or failing wheel bearing. This is one of those repairs that drivers often delay — until they realize just how critical a wheel bearing is to safe vehicle operation. Understanding the wheel bearing replacement ahead of time helps you plan your budget, avoid overpriced estimates, and make informed decisions at the shop.

In this guide, we’ll break down everything you need to know about wheel bearing repairs in the United States — from average pricing and labor rates to the difference between front and rear replacements, and when you should consider DIY versus professional service. Whether you’re searching for the cost to replace wheel bearings on a budget sedan or a heavy-duty truck, this guide has you covered.

What Is a Wheel Bearing and Why Does It Matter?

A wheel bearing is a set of steel balls or rollers held in a metal ring (called a race). It allows your wheels to spin freely with minimal friction while supporting the full weight of your vehicle. Every car has four wheel bearings — one at each wheel — and they endure enormous stress from acceleration, braking, cornering, and road vibration every single day.

When a bearing starts to wear out, metal-on-metal contact increases, generating heat and noise. Left unaddressed, a failing bearing can lead to:

  • Uneven or accelerated tire wear
  • ABS sensor malfunction (on modern vehicles)
  • Steering instability and wheel wobble
  • Complete wheel separation in extreme cases

That’s why the cost to replace wheel bearing is well worth paying promptly once the signs appear — not just for your wallet, but for your safety on the road.

Average Wheel Bearing Replacement Cost in the USA

The total bearing replacement cost in the United States typically falls between $150 and $800 per wheel, depending on the vehicle type, location, and whether you choose a dealership or an independent shop. Many drivers searching for the cost to replace bearings are surprised to find how much variation exists based on these factors. Here’s a general cost breakdown:

  • Front Wheel Bearing (FWD) — Parts: $80–$150 | Labor: $70–$140 | Total: $150–$290
  • Rear Wheel Bearing (Sedan) — Parts: $60–$120 | Labor: $80–$160 | Total: $140–$280
  • Front Hub Assembly (4WD/AWD) — Parts: $150–$300 | Labor: $100–$200 | Total: $250–$500
  • Rear Hub Assembly (Truck/SUV) — Parts: $120–$250 | Labor: $100–$200 | Total: $220–$450
  • Luxury/Performance Vehicle — Parts: $200–$500+ | Labor: $150–$300 | Total: $350–$800+

Keep in mind these are estimates. Actual prices vary by region, shop rates, and vehicle make/model. Luxury brands like BMW, Mercedes-Benz, and Audi tend to be on the higher end, while economy cars like Honda Civic or Toyota Corolla fall toward the lower range.

Front Wheel Bearing Replacement Cost

Front wheel bearings generally cost a bit more to replace than rear ones, simply because the front axle handles both steering and (in front-wheel drive vehicles) power delivery. The  bearing hub assembly replacement cost is especially relevant for FWD and AWD vehicles, where the hub and bearing are often sold as a single integrated unit.

For a standard front-wheel drive car, the cost to replace a front wheel bearing typically runs:

  • Parts: $80 – $200 depending on brand (OEM vs. aftermarket)
  • Labor: $70 – $150 at most independent shops
  • Total: $150 – $350 per side

For trucks, SUVs, and AWD vehicles where the hub assembly must be replaced as a complete unit, the front wheel bearing hub assembly replacement cost can range from $250 to $500 or more per wheel. This is because the hub assembly — which integrates the bearing, spindle, ABS sensor, and mounting hardware — is a more complex component and requires more labor time to install correctly.

Pro tip: If one front bearing is failing, many mechanics recommend replacing both front bearings at the same time. You’ll save on labor costs since the car is already raised and partially disassembled, and you’ll avoid coming back in six months for the second side.

Rear Wheel Bearing Replacement Cost

The bearing replacement cost is generally a bit lower than the front, particularly on non-driven rear axles (like those found on front-wheel drive sedans). However, AWD, 4WD, and rear-wheel drive vehicles have powered rear axles that make the job more involved.

Typical cost of replacing a rear bearing by vehicle type:

  • Front-wheel drive sedan (rear non-driven): $140 – $280 per side
  • Rear-wheel drive or AWD vehicle: $200 – $400 per side
  • Full-size pickup truck or SUV: $220 – $500 per side

On some vehicles — especially older domestic cars and trucks — rear wheel bearings are pressed into the axle housing and must be removed with a hydraulic press. This specialized tool requirement can add to both time and cost at a shop. Your mechanic should be upfront about this before starting the job.

If you drive a rear-wheel-drive truck or SUV and notice a hum or vibration that changes with vehicle speed, addressing the rear bearing replacement cost early on can prevent a more expensive axle or differential repair down the line.


wheel bearing replacement cost

What Factors Affect the Replace Wheel Bearing Cost?

Several variables influence how much you’ll actually pay when you replace wheel bearing components on your vehicle:

1. Vehicle Make and Model

Domestic vehicles like Ford, Chevrolet, and Dodge tend to have more affordable parts and are easier to work on. European and luxury vehicles often require OEM-specific components, which dramatically raises the replace wheel bearing cost.

2. Standalone Bearing vs. Hub Assembly

Older vehicles often use serviceable tapered roller bearings that can be replaced independently of the hub. Newer vehicles, particularly compact cars and crossovers, use sealed hub bearing assemblies. The front wheel bearing hub assembly replacement cost is higher because you’re replacing a complete integrated unit — but installation is often faster and more reliable.

3. OEM vs. Aftermarket Parts

OEM (Original Equipment Manufacturer) parts come directly from the vehicle manufacturer and are guaranteed to fit and perform as designed. Aftermarket parts from reputable brands like Timken, Moog, SKF, or FAG can be 30–50% cheaper with comparable quality. Avoid bargain-bin parts from unknown suppliers — wheel bearings are safety-critical components.

4. Labor Rates by Region

Labor rates vary significantly across the United States. Shops in metropolitan areas like New York City, Los Angeles, or Chicago typically charge $120 – $180 per hour, while shops in rural areas or smaller cities may charge $70 – $110 per hour. A typical wheel bearing replacement takes 1–2 hours of labor.

5. Dealership vs. Independent Shop

Dealerships often charge 20–40% more for the same repair compared to independent shops, largely because of higher overhead and mandatory use of OEM parts. For a job like a bearing replacement — which doesn’t require proprietary tools or dealer-exclusive software — a trusted independent mechanic is almost always the better value.

Signs You Need a Wheel Bearing Replacement

Catching a failing wheel bearing early can save you significant money and prevent a dangerous situation on the highway. Here are the most common warning signs that it’s time to look into the cost to replace wheel bearing on your vehicle:

  • Humming, growling, or rumbling noise that changes with speed
  • Noise that gets louder when turning in one direction
  • Vibration felt through the steering wheel or floorboard
  • Looseness or wobble when you grab the top and bottom of the tire and rock it
  • ABS warning light illuminated on the dashboard (bearings often house ABS sensors)
  • Uneven or accelerated tire wear on one side

The most reliable test: while driving at moderate speed on an empty road, slowly weave the car side to side. If the noise changes or disappears as you shift weight from one side to the other, that’s a strong indicator of a failing wheel bearing on the side that quiets down when weight shifts away from it.


Front Wheel Hub Bearing

DIY Wheel Bearing Replacement: Is It Worth It?

For experienced home mechanics, replacing a wheel bearing is a manageable job — particularly on modern vehicles with bolt-on hub assemblies. Doing it yourself can cut the wheel bearing replacement cost by 50% or more, since you’re only paying for parts.

However, there are real challenges:

  • A press-fit bearing requires a hydraulic press — a tool most home mechanics don’t own
  • Improper installation can cause premature bearing failure or unsafe handling
  • On 4WD and AWD vehicles, axle shafts and CV joints must be removed, adding complexity
  • Some jobs require a torque wrench with specific torque values for the axle nut

If you’re comfortable with intermediate mechanical work and your vehicle uses a bolt-on hub assembly, DIY is a viable path. For press-fit bearings or driven rear axles, we recommend leaving it to a professional — especially when considering that the cost of replacing a rear wheel bearing professionally is far less than the cost of a mistake.

How to Save Money on Wheel Bearing Repairs

Getting the best possible replace wheel bearing cost doesn’t mean cutting corners — it means shopping smart. Here are practical tips:

  • Get at least 3 quotes from local shops before committing to a repair
  • Ask if both sides should be done at once to save on labor
  • Ask whether an aftermarket Timken or SKF bearing is an option
  • Check if your vehicle is still under warranty — some extended warranties cover drivetrain components
  • Look for coupons or service specials at chain shops like Firestone, Midas, or Pep Boys
  • Join online forums for your vehicle make — members often share trusted local shops and fair prices

Also, don’t ignore the problem hoping it goes away. A worn wheel bearing that’s allowed to fail completely can damage the knuckle, axle, or CV joint — turning a$200 repair into a $1,000+ job. The cost to replace wheel bearings early is always far less than the collateral damage from waiting too long.

Wheel Bearing Replacement Cost by Popular Vehicle

To give you a realistic benchmark, here’s a look at the rear wheel bearing replacement cost and front bearing costs for some of the most common vehicles on American roads:

  • Toyota Camry: $160 – $280 per bearing
  • Honda Accord: $150 – $270 per bearing
  • Ford F-150: $220 – $420 per bearing
  • Chevrolet Silverado: $200 – $400 per bearing
  • Jeep Grand Cherokee: $250 – $480 per bearing
  • BMW 3 Series: $350 – $700 per bearing
  • Ford Explorer: $230 – $450 per bearing
  • Toyota RAV4: $190 – $360 per bearing

These figures reflect typical combined parts and labor costs at an independent shop. Dealership pricing can be 20–40% higher across the board.

Frequently Asked Questions

How long does a wheel bearing last?

Most wheel bearings are designed to last between 85,000 and 100,000 miles under normal driving conditions. However, frequent exposure to water, mud, or rough roads can shorten that lifespan considerably.

Can I drive with a bad wheel bearing?

You should not drive with a confirmed bad wheel bearing beyond what’s absolutely necessary to reach a repair shop. At highway speeds, a severely worn bearing can seize, causing the wheel to lock up — a catastrophic and potentially fatal event. The wheel bearing replacement cost is minor compared to the risk.

Does insurance cover wheel bearing replacement?

Standard auto insurance policies do not cover mechanical wear and tear. However, if you have an extended vehicle warranty (either factory or third-party), it may cover the repair. Review your warranty documentation or call your provider before paying out of pocket.

How long does the repair take?

A typical wheel bearing replacement takes 1 to 2 hours per bearing at a professional shop. Hub assembly replacements on modern cars can sometimes be done in under an hour. Pressed-in bearings on older trucks may take 2–3 hours or more.

Final Thoughts

Understanding the wheel bearing replacement cost puts you in a much stronger position when dealing with auto repair shops. Whether you’re dealing with a noisy front hub on a daily commuter or a grinding rear axle on a work truck, the repair is straightforward and the cost is manageable — especially when caught early.

The cost to replace bearing typically ranges from $150 to $500 for most everyday vehicles, with luxury and heavy-duty trucks running higher. Front hub assembly replacements and rear bearing jobs on driven axles will be on the upper end of that range, but the investment protects your tires, your steering, your ABS system — and most importantly, your safety.

If you’re unsure whether your vehicle needs a wheel bearing inspection, don’t wait for the noise to get worse. A quick visit to a trusted local shop for a complimentary inspection can give you a clear answer and an honest estimate — so you can get back on the road with confidence.

This article is intended for informational purposes. Prices are estimates based on national averages and may vary by location, vehicle type, and shop rates. Always get multiple quotes before authorizing any repair.

engine air filter replacement

Engine Air Filter Replacement: The $20 Fix That Saves Your Engine

Engine Air Filter Replacement: The Complete Guide Every Car Owner Needs

Let’s be honest — most of us don’t think about our car’s air filter until something goes wrong. It’s not exactly the most exciting part of owning a car. But here’s the thing: that small, inexpensive filter hiding under your bonnet plays a surprisingly big role in how well your engine runs, how much fuel you use, and how long your car lasts.

Skipping your engine air filter replacement doesn’t just hurt performance. It quietly drains your wallet at the petrol station, puts extra stress on your engine, and — if you leave it long enough — it can cause damage that costs far more to fix than a simple filter swap ever would.

The good news? Replacing your engine air filter is one of the quickest, easiest, and cheapest maintenance jobs you’ll ever do. In this guide, we’ll walk you through everything — the warning signs to watch out for, the types of filters available, a simple step-by-step replacement guide, and everything else you need to make a smart decision for your vehicle.

Quick fact: A clogged air filter can cut your fuel economy by up to 10% — and replacing it costs as little as $15 and takes under 10 minutes.

Think of your engine like a person running a race. To perform well, it needs a steady supply of clean, fresh air. Your engine burns a mix of air and fuel to produce power — and for every single gallon of fuel it uses, it pulls in around 10,000 gallons of air. That’s a massive amount of air passing through your engine every day.

Now imagine all that air coming straight off the road — carrying dust, dirt, pollen, tiny bits of debris, even insects. Without a proper filter in place, all of that would go straight into your engine’s cylinders, scraping against pistons, valves, and cylinder walls every time you drive.

Your engine air filter sits in the air intake system and catches those particles before they cause damage. Over time though, it fills up — and a full filter can’t do its job properly. That’s when you start noticing problems. Reduced performance, worse fuel economy, strange engine behaviour. All from one small, clogged part that most people never even think about.

That’s exactly why staying on top of engine air filter replacement matters. It’s one of those simple habits that protects your engine — and your budget — in the long run.

7 Warning Signs Your Engine Air Filter Needs Replacing

Your car is pretty good at telling you when something isn’t right — if you know what to look for. Here are the most common signs that your engine air filter is overdue for a change:

1. You're Stopping at the Petrol Station More Often

Have you noticed your fuel economy dropping lately? If you’re filling up more often but driving the same distances, a dirty air filter could easily be the culprit. When your engine can’t pull in enough clean air, it has to burn extra fuel to compensate. You might not notice it week to week, but over a few months it really adds up — both in wasted fuel and money.

The fix? A fresh filter restores proper airflow, and your fuel efficiency bounces back. It’s one of the fastest returns on a $15 to $30 investment you’ll find anywhere in car maintenance.

2. Your Car Feels Sluggish or Slow to Respond

Press the accelerator and notice a delay? Feel like the car doesn’t have its usual get-up-and-go — especially when you’re overtaking or climbing a hill? That hesitation is often a direct result of poor airflow. A clogged filter restricts the air supply to the engine, and less air means less power. It’s a simple equation.

Once you replace the filter, most drivers notice an immediate improvement in throttle response. The car feels more alive and responsive — like it used to.

3. The Engine Shakes or Runs Rough at Idle

When you’re sitting at the lights or parked up with the engine running, does it shake, vibrate, or sound rough? This is what mechanics call “rough idling,” and a dirty air filter is one of the most common causes. When the air-fuel mixture inside the engine gets thrown off balance — which happens when airflow is restricted — the engine misfires or runs unevenly. Before you start worrying about bigger problems, check your air filter. You’d be surprised how often that’s all it takes.

4. You're Seeing Black or Dark Smoke from the Exhaust

Your exhaust should be fairly clean under normal driving conditions. If you’re noticing black or dark grey smoke coming out of the tailpipe, it usually means your engine is burning too much fuel and not enough air — a classic sign of a blocked air filter. You might also catch the smell of unburnt fuel coming from the back of the car. Both of these are signs that your engine air filter needs immediate attention.

5. The Check Engine Light Has Come On

Nobody likes seeing that little warning light on the dashboard. While a check engine light can be triggered by all sorts of things, a clogged air filter is a surprisingly common cause. Modern vehicles have sensors — like the mass airflow (MAF) sensor and oxygen sensors — that constantly monitor the air going into your engine. When they detect something off due to restricted airflow, they flag it up. Before spending money on a diagnostic scan, pull out your air filter and take a look. It might save you a trip to the garage.

6. Strange Noises from the Engine

Coughing, sputtering, or popping sounds when you start the car? These odd noises often happen when the engine is struggling to get enough air. Irregular combustion — caused by a restricted air supply — can make the engine sound like it’s choking. It’s not a sound you should ignore. If your car is making these kinds of noises and you can’t remember the last time you changed the air filter, that’s probably your answer.

7. The Filter Looks Dark and Dirty

Sometimes the simplest check tells you everything. Open the bonnet, find the air filter housing, and pull the filter out. A brand new filter is white or off-white. One that needs replacing will be dark grey, brown, or black — and you might see clumps of dirt and debris packed into the pleats.

If you’re not sure, hold it up to the light. If you can’t see light through it clearly, it’s time for a new one. Most manufacturers recommend inspecting your filter every 15,000 miles and replacing it every 15,000 to 30,000 miles — though if you regularly drive on dusty roads or in polluted city traffic, you’ll want to check it more often.

Ut elit tellus, luctus nec ullamcorper mattis, pulvinar dapibus leo.

A handy habit: Check your air filter every time you get an oil change. It only takes 30 seconds, and it’s a great way to stay ahead of problems before they start costing you money.

How Often Should You Replace Your Engine Air Filter?

Most vehicle manufacturers recommend replacing your engine air filter every 15,000 to 30,000 miles — roughly every one to two years for the average driver. But honestly, your driving conditions make a bigger difference than the calendar.
You’ll probably need to replace it more often if you:

  • Drive on unpaved roads, farm tracks, or dusty rural routes
  • Live in a busy city with heavy traffic and poor air quality
  • Mostly take short trips where the engine never fully warms up
  • Drive through areas with wildfire smoke, road works, or construction dust
  • Own an older, higher-mileage vehicle

The best approach is simple: check your owner’s manual for your car’s recommended interval, and do a quick visual check whenever you’re under the bonnet. If the filter looks dirty, don’t wait — just replace it. The cost of a new filter is nothing compared to the cost of running on a clogged one.

Walk into any auto parts store and you’ll find a few different types of engine air filters. They’re not all the same — so here’s a quick rundown to help you choose:

Standard Paper (Disposable) Filters

These are what most cars come fitted with from the factory. Made from pleated paper or synthetic fibre, they do a great job of trapping dust and particles — catching up to 99% of airborne contaminants. They’re affordable, widely available, and perfectly suited to everyday driving. When they’re done, you just swap them out for a new one. Simple as that.

High-Performance Reusable Filters (Cotton Gauze)

Brands like K&N and Spectre make reusable cotton gauze filters that are designed to let more air flow through the engine compared to standard paper filters. The idea is to improve throttle response and give the engine a little more breathing room — which can translate to modest gains in horsepower and fuel efficiency. They cost more upfront, but you wash and reuse them rather than throwing them away, so they often work out cheaper over the life of the car. A popular choice for drivers who want a bit more performance from their vehicle.

Foam Filters

You’ll mostly find foam filters on off-road vehicles, ATVs, and bikes. They’re great at catching large particles in extreme dusty environments and are also washable and reusable. For standard road cars, foam filters are less common — but if you frequently drive off-road or in very harsh dusty conditions, they’re worth considering.

Not sure which filter fits your car? Use our vehicle filter finder — just enter your make, model, year, and engine size and we’ll show you the exact match.

engine air filter replacement

Seriously — this is one of the most beginner-friendly car jobs out there. No special tools, no mechanical experience needed. Here’s exactly what to do:

  1. Get the right filter first. Check your car’s year, make, model, and engine size, and find the correct replacement. Using the wrong size leaves gaps that let dirty air straight into the engine — so don’t skip this step.
  2. Open the bonnet and find the air filter housing. Look for a large black plastic box near the engine, usually connected to a thick intake hose. If you’re not sure where it is, a quick look at your owner’s manual will point you straight to it.
  3. Open the housing. Most air filter housings are secured with metal clips or a couple of screws. Release the clips or undo the screws, then lift the lid.
  4. Take out the old filter. Lift it out carefully to avoid shaking dust and debris into the intake. Take a mental note of how it sits in the housing — you’ll want to put the new one in the same way.
  5. Clean inside the housing. Give the inside of the housing a quick wipe with a clean, dry cloth to remove any loose dirt before fitting the new filter.
  6. Put the new filter in. Place it in the housing in the same orientation as the old one. Press it down so it sits flat with no gaps around the edges — any gap means unfiltered air can sneak through.
  7. Close everything back up. Reattach the clips or screws and make sure the housing is properly sealed. Give it a gentle tug to check it’s secure.

And you’re done. Start the engine, take it for a short drive, and enjoy the difference. For most cars, this entire job takes between 5 and 10 minutes — and you’ll wonder why you ever paid someone else to do it.

How Much Does It Actually Cost?

This is one of those maintenance jobs where the cost is genuinely very low — especially when you consider what it protects. Here’s a rough breakdown:

  • Standard disposable filter: $10 to $35 depending on your vehicle
  • High-performance reusable filter (K&N, Spectre, etc.): $45 to $90+, but it lasts the life of the car
  • Garage labour if you’d rather not do it yourself: Add $20 to $50 on top

Now compare that to the alternatives. A failed mass airflow (MAF) sensor caused by a dirty filter? That’s $150 to $400 to fix. Catalytic converter damage from a rich fuel mixture? That can cost over $1,000. And that’s before we even talk about the ongoing cost of poorer fuel economy over months and years of driving on a clogged filter.

A $20 filter is cheap. Ignoring it is expensive. It really is that straightforward.

Smart move: While you’re at it, check your cabin air filter too. It filters the air inside your car — and both filters are often due around the same time. Doing both together saves time and keeps your whole air system in top shape.

Engine Air Filter vs. Cabin Air Filter — What's the Difference?

People mix these two up all the time, and it’s easy to see why. They’re both air filters. But they do completely different jobs:

  • Engine air filter: Filters the air going into your engine for combustion. Protects engine components and keeps the air-fuel mixture balanced. Lives under the bonnet in the air intake system.
  • Cabin air filter: Filters the air coming into the passenger cabin through your heating and air conditioning vents. Protects you and your passengers from dust, pollen, mould spores, and other allergens. Usually found behind the glove box or under the dashboard.

Both need regular replacement — and both are worth checking at the same time. A dirty cabin air filter won’t damage your engine, but it will reduce air quality inside the car and put unnecessary strain on your HVAC system. If you’re doing one, you might as well check the other.

What Happens If You Ignore Your Air Filter?

We get it — it’s easy to keep saying “I’ll do it next time.” But here’s what’s actually happening to your car the longer you wait:

  • Your fuel costs go up. A restricted engine air filter means your engine is working harder and burning more fuel. Over months of driving, that’s a meaningful hit to your budget.
  • Engine wear speeds up. If enough particles get past an overloaded or damaged filter, they cause abrasive damage inside your engine. Cylinder walls, pistons, intake valves — none of them are cheap to repair or replace.
  • Your MAF sensor gets damaged. A clogged filter can let fine dust reach the mass airflow sensor. Once that gets contaminated, it reads incorrectly and can trigger all kinds of performance problems — and replacing it isn’t cheap.
  • Your catalytic converter can suffer. When the engine burns a fuel-rich mixture (because it can’t get enough air), unburnt fuel can reach the catalytic converter and damage it over time. Catalytic converter replacement is one of the more expensive repairs on any car.
  • Your car ages faster. All of the above compounds over time, shortening the life of your engine and your vehicle overall.

There’s really no good reason to delay. A filter costs $15 to $30 and takes minutes to change. The cost of ignoring it is genuinely much, much higher.

How to Choose the Right Replacement Air Filter

With so many options available, it helps to know what to look for. Here are a few key tips when buying a replacement:

  • Match your vehicle: Always choose a filter that is designed for your specific car make, model, year, and engine size. A wrong-fit filter can leave gaps that allow dirty air through.
  • Consider your environment: If you drive in dusty areas or on unpaved roads, choose a filter with higher dust-holding capacity. Heavy-duty or off-road filters are designed for these conditions.
  • OEM or aftermarket: OEM (original equipment manufacturer) filters are made to the exact specification of your car. Quality aftermarket brands such as Fram, Bosch, Mann-Filter, Denso, and K&N are all reliable alternatives and often available at better prices.
  • Think long-term: If you plan to keep your vehicle for many years, a high-performance reusable filter may save you money over time compared to repeated disposable replacements. 

Performance upgrades: For drivers who want better engine performance, a high-flow air filter paired with a cold air intake system can deliver measurable gains in horsepower, torque, and throttle response.

Frequently Asked Questions About Engine Air Filter Replacement

Check for these signs: reduced fuel economy, slow acceleration, rough engine idling, black exhaust smoke, the check engine light turning on, or a visibly dirty and discoloured filter. Any one of these is a good reason to inspect and replace your filter.

Can I clean and reuse a disposable air filter?

No. Paper and disposable air filters are designed for single use. Trying to clean them can damage the filter material and reduce their ability to block particles. Only cotton gauze filters (such as K&N) are designed to be washed and reused.

Will a new air filter improve performance?

Yes. Replacing a clogged filter with a fresh one restores proper airflow to the engine. This can improve throttle response, smooth out engine idling, and recover lost fuel economy. A high-performance filter can deliver additional airflow improvements beyond a standard replacement.

What is the difference between an engine air filter and a cabin air filter?

The engine air filter protects your engine by filtering the air used for combustion. The cabin air filter protects the air inside your car by filtering what comes through the ventilation system. Both need regular replacement, but they are separate parts with separate locations in the vehicle.

Most engine air filter replacements take between 5 and 10 minutes. No special tools are required. It is one of the quickest and easiest maintenance jobs a car owner can do at home.

Engine air filter replacement is one of the simplest and most cost-effective things you can do to protect your vehicle. A clean filter means better fuel economy, stronger performance, and a longer engine life. A dirty, clogged filter means the opposite — wasted money, reduced power, and gradually increasing damage to your engine.

If your car has been showing any of the warning signs covered in this guide — poor fuel economy, sluggish acceleration, rough idling, black exhaust smoke, or the check engine light — do not wait. An engine air filter replacement may be all your car needs, and it is one of the fastest fixes available.

Browse our full range of engine air filters, cabin air filters, and performance intake systems. We stock filters for thousands of vehicle makes and models, with trusted brands, competitive prices, and fast delivery. Shop engine air filters now and keep your engine running at its best.


Search for products

Back to Top
Product has been added to your cart
Compare (0)